
A C C E S S O R I E S

Let customers speak for us
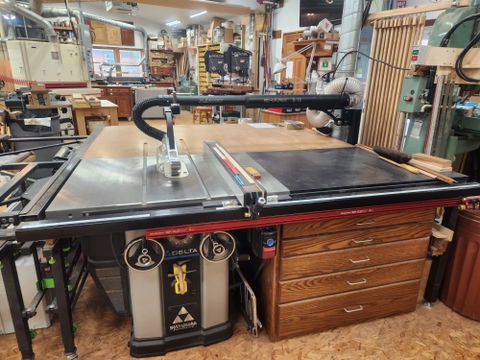
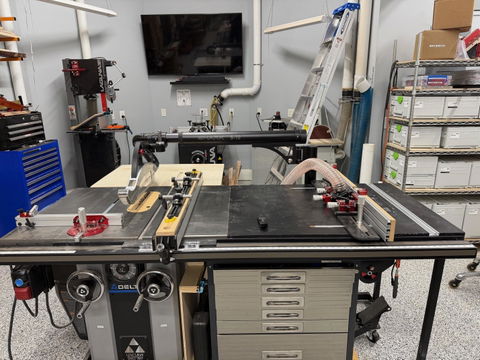
I have used a Biesemeyer overhead guard on my Unisaw for over 40 years. It worked well, until the last few years as I have gotten older. There are times when the guard in in the way & needs to be removed. The last few years, removing the Biesemeyer became almost impossible for me to move out of the way. After seeing the Harvey Shark S-10 overhead guard & how it would just swing out of the way, I had to have one. Then I had to get it mounted to my Unisaw. I did not need the very nicely designed sliding mount, but I did use it. In my install, I did not use the support leg. Harvey needs to offer a solid mount option for those that do not need the sliding mount option. The blade guard is also also much easier to use than the Biesemeyer.
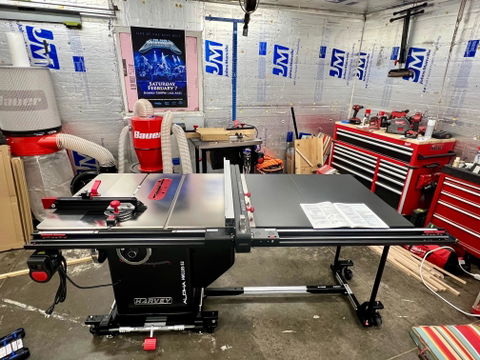
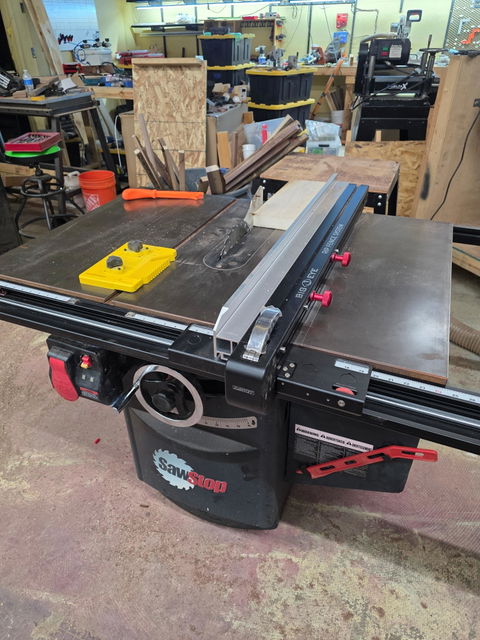
I have been wanting to get Harvey table saw for years! Finally was able to have the space and funds. I will have to say, I already have their compass router table with stand. The 4hp saws fit and finish are superb. Also, I ordered the M-1500pro mobile base and extension. Instructions and assembly video really helped out. I had it assembled in a day. The miter slots to the blade are dead on(0.01mm) from front to back, straight from the factory. Everything was dialed in perfectly from the factory, which made calibration EASY. From the miter gauge to the saw, to the big eye fence, nickel plating and the mobile base, I love it. Finally, I have my dream saw! HIGHLY RECOMMENDED!!
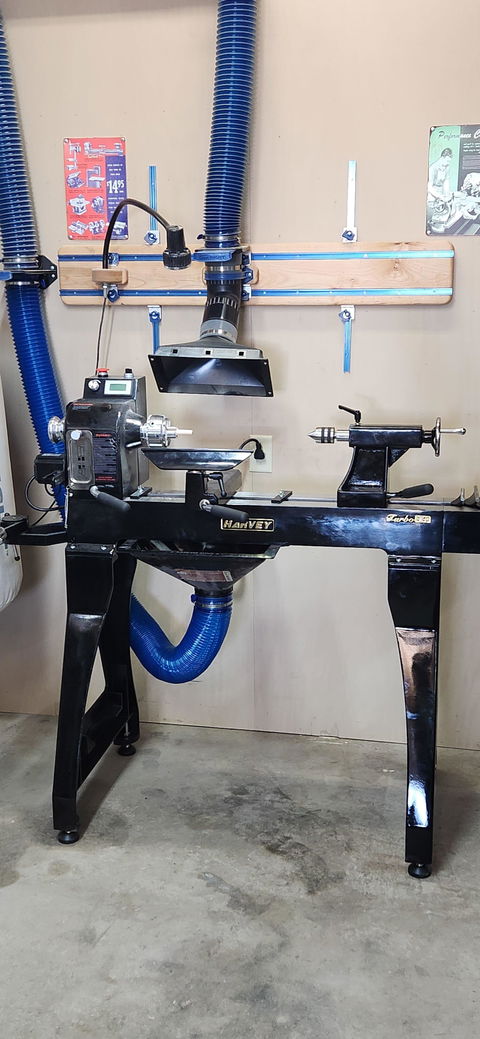
The T 40 Turbo lathe is the best lathe I have had the opportunity to use have not had it long enough to do any big project yet but getting the legs ,extension bed and out board tool rest was the best move I made can't wait to do a bowl and outher projects
I’ve never owned a table saw that is this beautiful this heavy duty in this accurate it is so nice. I don’t want to use it, but I will. I think they are making the best tools when it comes to table saw
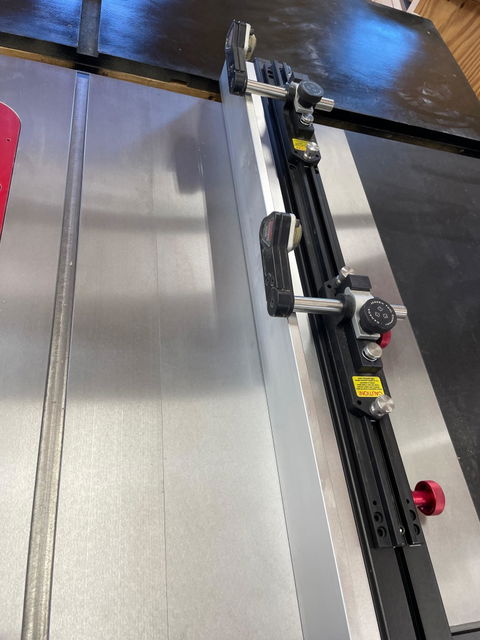
I've been working with wood for over 40 years. Just a hobby for now. I finally decided to purchase the Big Eye Fence system, and it is absolutely great. It was simple to set up and is simple to use. Once it is dialed in, it is ridiculously accurate. No more bumping fence into position, only to have it move as you clamp it down. Just move fence to desired measurement using the indicator and lock it down. That's it. It truly is a game changer when it comes to fences and accuracy.
I was so impressed by the thought and engineering that went into it, that I also ordered and received the Harvey MG-36 Pro (and will review that as well, once I have some time with it).
If you're on the fence about ordering the Big Eye Fence system, just do it. I think you'll be extremely happy with it.
Don
Installed on a Shop Fox W1819 (Grizzly G0690 clone)
I’ve had my saw set up and in use now for a couple days. Had a Jet table saw ordered but it was on back order so I started checking out the competition and man am I glad I did. Love my Harvey. Everything about it is just top notch. Love those adjustment wheels. Smooth as silk. The big eye fence system is just simply awesome. Dust collection- well It would have been nice to have options as to where the 4 inch dust port is located. It’s on the right side of the saw and my hose comes from the left so I have to wrap the hose clear around the saw to hook it up. Might just have to drill my own hole in the back. One thing I’ve noticed with the big eye fence system though is that when using the saw, chips of wood collect on the back rail where the fence slides. The wood chips have an opposing effect on that smooth sliding fence. I cut some small blocks of wood and glued foam rubber on the bottom. I attached them on the fence so as the fence slides back and forth the foam rubber cleans out the rail in front of the fence. Fixed that little problem. All in all I really like my saw and I’m impressed with Harvey. Very professional.
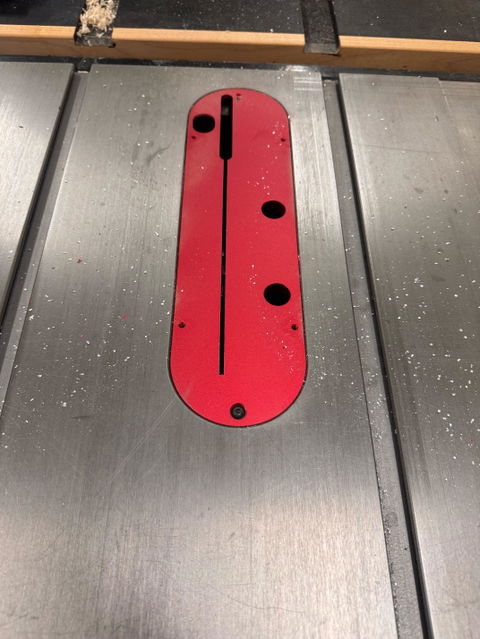
A necessity to any table saw. Another high quality item from Harvey. Very easy to adjust and fit. The side screws are a nice feature. Makes the insert fit precisely when switching in and out. Very satisfied, once again.
Everything was calibrated perfectly out of the box. The fence is an absolute beast and the Leitz blade is truly a superior blade. 100% satisfied with this equipment!
Overall, the fit and finish on this product is incredible. Once everything is attached properly and aligned, it is Rock solid. I am incredibly satisfied with the quality and craftsmanship of this fence.
That being said however, I did have some issues during installation. It may be due to the fact that my saw is an older sawstop, from around 2004 to 2010, but I had a significant amount of difficulty getting everything installed in aligned. The mounting positions on my saw did not match up to the mounting holes on the fence. I ended up having to drill out the mounting holes in the table quite significantly in order to accommodate this fence, as the mounting position on this older saw placed the hardware much too close to the top of the table surface, preventing proper fitment.
Furthermore, the instructions were a bit unclear in a few different places. The instructions indicate that you must have 11.5 mm of clearance from the top of the table to the top of the fence rail, but they don't explain why. Turns out, this is to ensure that the top of the rail clears the bottom of the miter slot, and there is even a fancy laser cut plastic alignment block to ensure this. This was not covered in the instructions, and I only figured it out by happenstance afterwards.
The instructions on the proper alignment of the scale, with regards to the high and low fence positions and sight glasses would also be beneficial. I understand that most experience would workers would already understand this, but as a relative novice, it took longer than I care to admit for me to figure out and get everything properly situated.
Additionally, there were two of the mounting bolts provided that did not match anything in the parts list. I am working off of memory here, but I believe that they were 30 mm M8, whereas the instructions only indicate 40mm or 55mm inmate hardware. As it turns out, these additional parts belong to the connecting rod assembly, which affixes the tail end of the fence rails. It caused no small amount of consternation during install as I had two different size fasteners and no indication of where they go.
One area which could also use some more clarification is the trailing edge of the fence. Just a simple diagram showing how the bevel on the clamping edge and the Teflon guide block that rides on top of the rear rail a line would be handy. It took more time than I care to admit to figure it out, including having to cut the threaded guide rod sleeve twice in order to get proper fit.
I completely understand the difficulties in writing technical documentation that caters to the lowest common denominator, such as myself, when coming from an engineering perspective. It is also a reasonable assumption that the people that would be investing over $1,000 in a new table saw fence would have the requisite experience and knowledge to improvise. I recognize that I am very much an outlier in both of these fields, and the fact that my saw is over a decade old certainly does not help.
In summary, this product is fantastic. When it locks, it locks Rock solid, to the point where I can shake my entire 700 lb table saw without the fence budging at all. The amount of adjustability built into this fence is incredible. I was able to find tune and tweak everything to get it dialed in exactly perfect. Less than 10 microns of run out on the fence across the entire length of the table. It is such an incredible product, produced and packaged with such evident care. It is truly the top of the line in terms of table saw fences. Unfortunately, I feel that the documentation does not live up to the quality of the product itself.
As much as I would like to say it was a great addition to my 4HP 52" SS Big Eye Harvey saw, I unfortunately don't own one. However, this zero clearance insert plate was a perfect fit on my Laguna Platinum saw. As expected fit and finish was perfect. Thanks for the great solution!
I wanted a saw capable of keeping cuts within tolerances of 0.004” (0.10 mm). So as I set the saw up I checked alignment and flatness at every step, aiming to have measured tolerances of 0.001” This may sound a little extreme to some, but I have tried to do fine work with a warped table and extensions before and will never waste my time and money like that again.
Here’s what I learned about Harvey's manufacturing tolerances and what it takes to properly set up the table saw.
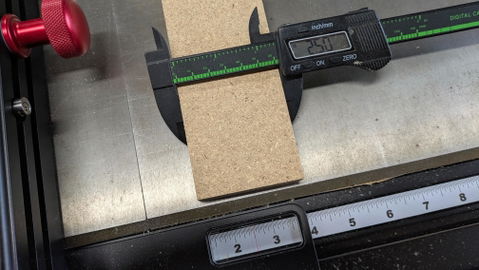
First, check alignment of saw blade to miter slots. Do this BEFORE adding wings, fence or sliding table to the basic saw. (The manual says add the fence first, which would just make this critical step more difficult). Some adjustment was necessary and grub screws would have made adjustments a lot easier (this is a suggestion to Harvey). I used a vernier caliper, but checked later with a dial gauge with miter slot block and it was good.
Second, assemble wing(s) and fence rails. Check wings for flatness. (The table was flat within my tolerances). On the right side I was adding two cast iron stainless coated wings in addition to the stainless router table ( I ordered a EWN 8365 wing to replace the laminated panel provided with the 52Pro saw. Laminated pressboard panels are never flat enough - the supplied one was warped over 0.020” - and don’t stay flat in my experience).
Both metal wings were warped. The worst had a 0.010” (0.25mm) cup at the edge. After communicating with Harvey customer service and finding this was apparently normal and correctable I proceeded to straighten the wings. First I got some Grade 8 (metric 10.9) 5/16” (8mm) bolts and lock nuts (the all-metal Grade 8 Type) to replace the softer hardware provided. I assumed I would need to apply a lot of torque to prevent the warped pieces from sliding out of place once they were aligned, and also did not want nuts to vibrate loose.
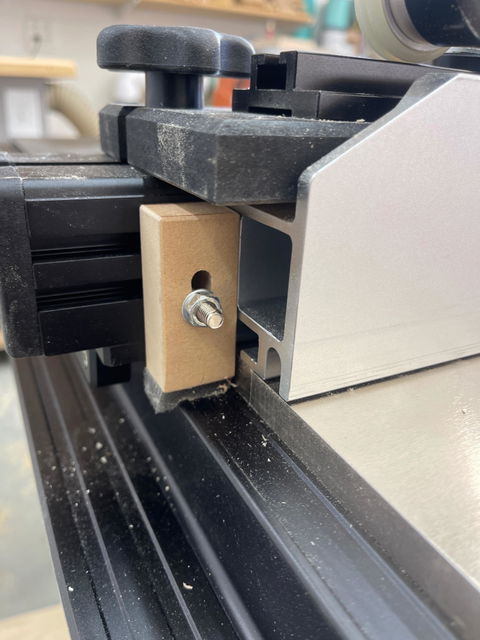
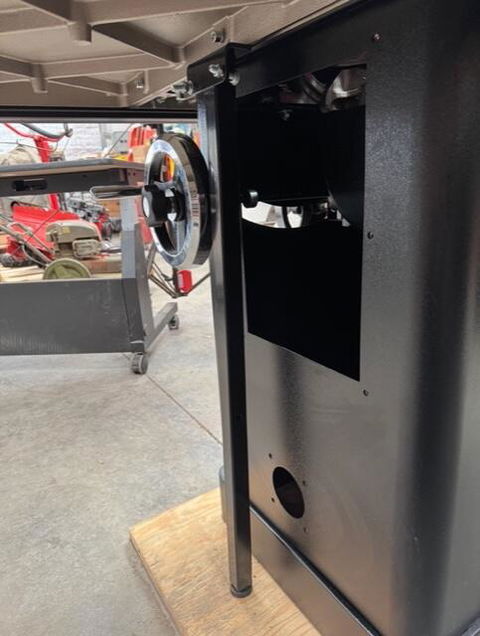
To align the first extension wing with the 0.010” cup I aligned the front and back edges and tightened those bolts, and left the center bolt just snug. Then I used one of the metal t-shaped legs as a jack to push the cupped edge up, using the height adjustment in the foot (see photo). I was a little surprised that it provided enough pressure to bend the cast iron. Then tightened the bolt.
The next wing - the EWN 8365 - was warped in the other direction so I again aligned the front and back, tightened those bolts, then snugged up the middle bolt pretty tight. Then hit the crown in the middle of the edge with a rubber mallet to bend it down. Again I was surprised at the flexibility. I had to experiment a little with the proper tightness on the middle bolt to allow movement while still staying in place after the adjustment until I could do the final tightening.
I needed to shim the wing joints to get everything coplanar. The only way to do this accurately and permanently is with metal shims. Stainless steel shim assortments are inexpensive - available on Amazon. The last piece - the router table - was flat.
I checked flatness at every step with a straightedge and feeler gauges and kept all gaps under 0.0015” (0.04mm) at all measured points. Seven months later the table is still as flat as when I set it up. I doubt many saw owners assemble their saws with this much care. I’ve never seen this done or even mentioned in the YouTube unboxing videos. But it’s essential to unlock all of the potential of any saw and produce professional cuts. It’s also nice to have a huge reference surface in the shop that I know is dead flat by woodworking standards.
Some other notes:
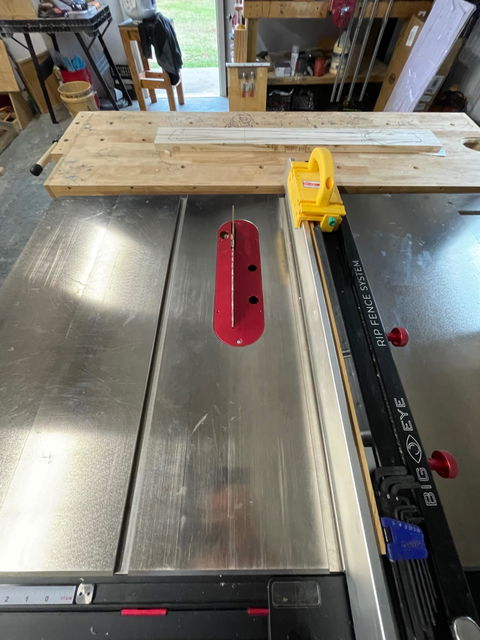
The miter gauge is great, but since I have the Harvey sliding table I replaced the fence with a sacrificial block that is milled square. Run it through the blade and the edge is dead-on aligned. I can clamp small pieces to it. If I need to measure length I just use the Big-Eye scale and pull back the sliding part of the fence Euro-style to prevent pinch and kickback.
The finger hole of the riving knife and the blade guard have sharp edges and could easily slice your fingers. Filing the sharp edges smooth is a good safety measure (and should have been done at the factory). I also spent some time aligning the riving knife. With the knife and blade guard aligned just right I am able to use my 3/32” Forrester blades without having to switch to the Harvey thin riving knife, and can also still use the blade guard (though to tell the truth I usually leave it off unless I’m especially concerned with dust collection, like when cutting MDF).
Stainless coating is great! It is durable - surface scratches have not gone through the coating. I didn’t know that wind-blown rain along with some corrosive leaf litter would drop down from the roof vent right onto the saw and router table in my new shop space. I keep the saw covered when I’m away, but it has gotten wet, with no corrosion damage.
I’m writing separate reviews about the Big Eye Fence, Sliding Table a...
I was nervous about making such a large purchase on a product where the brand was new to me and I was not able to view it physically. The review in the various forums encouraged me to take a chance. Customer support was extremely helpful in coordinating with the freight company the logistics required to get it to my residential shop. The saw arrived on time and very well packaged. Assembly was very straight forward and I was making my first cut within the next few days. The quality of all the components has surpassed my expectations. I’m sold on Harvey.
I mounted the Shark S10 on my Delta 5hp unisaw with Router in extention wing. Fairly easy to mount. works well when if you don't try to fast feed the wood. Definently happy with the purchase.
This fence system is amazing. The fence stays in place when the lockdown is engaged. You don’t have to allow for the slight movement you get with other fences as you move the handle into the lock position. I was surprised how much I use the fine adjustment wheel and the stops. The stops are very handy if you have to change the fence position and then return to a previous spot. And there are four of them. The track on the top works perfectly for my Jessum guides. A couple of washers for shims and it works perfectly. I thought it was funny when I saw in Fine woodworking Magazine how they touted the breakthrough on the Sawstop introducing a fence that works in both a high and low position. It looks like Sawstop copied the Harvey fence. Easy to install too
Who knew that a zero clearance insert could be improved. All the ones I’ve used worked fine but they move slightly when placed in the throat of the saw. This causes the original cut in the plate to widen. Harvey’s plate has small nylon set screws on the sides. Once the plate is adjusted, it goes in tight and always in the same position. You can’t see the screws when looking on their website so I included a picture

What customers think about the store
Offers premium woodworking tools with exceptional build quality, precision engineering, and outstanding customer service. Products feature innovative designs like the Big Eye fence system. Customers praise packaging, accuracy, and durability. Some note instruc...